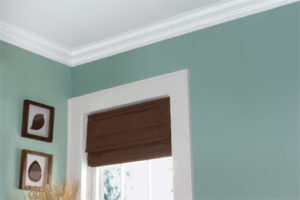
How to Install Crown Trim
How to Paint Rusty Metal Garage Doors
December 2, 2015Painting Rusty Iron Fences and Gates
December 13, 2015Be prepared….Installing Crown molding is not easy!
It is on an order of magnitude, more complicated than installing a new baseboard. Try installing baseboard first, it is good for measuring simple angles and perfecting carpentry skills. To install baseboard, you need a simple  mitre saw as you only need to half the angle of the corner and be sure your length is correct to get a good fit; but…..as my old woodshop teacher Mr. Dickson used to say, “measure it twice….cut it once”.
The reason finely installed crown trim is more difficult is that you are dealing with two angles on the cut. Wall/ceiling and wall/wall junctions are never quite exactly 90 degrees and if cuts are off 1/2 degree on a 6″ molding, you will not believe how big the resulting gaps can get! But properly installed, a crown will add a visual interest and value to your room.
Which Type of Crown Molding to Use:
If you are going to paint your new crown, you have basically two choices, real wood and a composite product with the generic term MDF (Medium Density Fiberboard).
- MDF is much less expensive and comes pre-primed and is easy to work with BUT….it should NOT be used in wet/high humidity areas as it can swell and warp….so not good for bathrooms (especially for baseboards.
- Real wood comes in various types. You want to stay away from “finger joined” types where short sections of wood are sectioned together to create a longer piece up to 16′. The problem with finger joined wood is that over time the different sections expand and contract at different rates causing the joints to open up.
- Solid one piece wood is the top of the heap….depending on wood type, you have the choice of painting it or, if the grain is particularly beautiful, you can stain and clear finish it.
- I use pre-primed wood in baths and MDF throughout the rest of the house, unless of course, the molding is to be stained. I did some mahogany crown once that cost $8 a foot!
Cutting the Corners of the Molding:
- The most difficult part of installing crown molding is cutting the corners to fit properly.
- If you have a very long wall you have to join two long runs together in a sharp angled cut called a scarf joint to help minimize the topography of the joint when finished.
- Corners must be cut with a compound miter saw. Compound because it is adjustable on two axis’/ angles (wall/ceiling and wall/wall). The key is to get proper measurements of the actual angles….you will often find that the angle is between 89-91 degrees. It does not seem like much but with a 6″ molding…a gap of up to 1/2 inch can result from improper measurement and adjustment of saw for cutting.
- At your local wood working shop like Rockeler, they will provide you with a book and protractors that will explain the required measures and geometry.
Go for Local Woodworking Store:
When it comes to install crown molding, it is really important to fit the proportions of your room and existing trim that will remain. Local suppliers that specialize in architectural millwork can provide you with various samples from which you can choose. In some cases, the local suppliers are more like to suggest moldings that are authentic to your home’s period and regional style. Important to get a good length to see how it looks in proportion to room size and ceiling height before buying all your materials. Proportion is everything!
Installation Strategies:
To insure a good solid installation, I do not trust that all my fasteners will hit wood framing and so I install a 1×3 pine strip around the perimeter of the room a few inches below the ceiling attached to the wall and fastened into the underlying studs….with this in place I can attach the crown without having to carefully measure to insure I am hitting a stud every time with the nail. An air compressor and finish nail gun will greatly speed up installation. You can rent these at the local home store. Have small, flat blade pry bars or stiff putty knives to adjust the trim as you fasten to shift the molding around imperfect “wavy” walls and ceilings. When caulking the inevitable gaps and seams, use a top line elastomeric caulk and have a bucket of water and a wet rag to keep you finger clean and wet as you smooth the caulk. To fill the nail holes, I recommend 3M Patch and Prime as it does not shrink; but do not forget to sand smooth before finishing. Another trick is to pre paint the molding before installing. Let me know if you have any questions…I would be happy to help you.
More on Crown Getting a crisp paint line


