Top 4 Steps to Follow When Painting Interior Walls
3 Steps To Paint the Interior Trim of Your Room
October 23, 2015Getting your old paint clean!
October 29, 2015Painting interior walls is, by far, the easiest way to freshen the look of your home. Here are some great tips to getting your painting project done more efficiently. 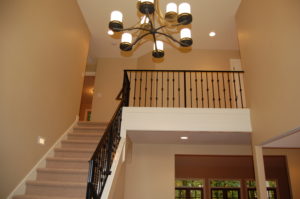
#1Step: Start from the Top Corner:
It is the best to start from the top corner of your home interior. Brush in at the ceiling (called cutting in) a three-to-four inch wide area around the perimeter. I prefer a 3 1/2″ angled brush with Chinex bristles. The brush is worth the $25 cost as it will easily give you a sharp clean line. Brush it out so you have a soft edge where you transition to the unpainted area. In the old days you would roll the walls immediately, while the just completed brush work is was still wet BUT, with today’s paints it is better to let the brushed areas dry and then roll….otherwise the brushed (cut in) areas will show in what we painters call “Picture Framing”
#2Step: Never Forget to Prepare the Surface:
Virtually all paint failures are due to improper surface preparation. The fact is that if you want a successful paint job, it has to start with properly preparing the surface area your need to paint. Cleaning, masking, repairing and priming as needed will insure that the topcoats look beautiful. Filling large holes in drywall Trim Prep Peeling paint
#3Step: Priming the Surface:
Fully priming your interior walls is only necessary on raw drywall or patched areas. You should also prime walls when your finish coat is acrylic but you are painting over oil based paint. Tinted primers can be very helpful when you are using a deep tone or yellow accent color. Manufacturers have designed certain gray primers that really help minimize # of topcoats necessary. Primer actually serves three purposes – it blocks stains from bleeding through the Top coat of paint, it can help in one-coat coverage for the paint, and lastly, it increases intercoat paint adhesion. Priming with a dedicated product (not a self-priming paint) also helps to reduce blisters and peeling.
#4Step: Use Paint Bucket, Not a Tray:
I prefer using a bucket over a paint tray. Instead, you can put the paint in a large paint bucket and roll paint directly from the bucket using a paint grid. Paint grid is a metal grid that hooks onto the rim of the paint bucket. You can fill the bucket about hallway with the paint and hang the grid inside . When you will start painting, you can dip the roller into the paint and roll it against the grid. For large walls or ceilings, a five gallon bucket and grid is best along with a 9″ roller. For smaller projects like doors and small bathrooms and cut in work, a 2 gallon bucket with grid and a 6″ “weenie roller” is very efficient.

